In preparation for our overland trip in 2016 Milady Landy gets a second fuel tank. The space for this is available under the driver’s seat (front right in this case). I thus hope to extend its range to 1,000 km, but I’m still waiting for my measurement of its real consumption (update: about 800-900km with both tanks depending on load of the engine).
Step one was buying all the parts (Paddock Spares is usually my supplier):
– SWB and LWB front fill fuel tank (552174)
– Fitting Kit for Fuel Tank 552 174 (PM267) was in retrospect not really necessary / useful, my bolt range proved more than enough …
– Sender unit – all SWB and LWB tanks with six screw cap (90,560,612)
– Pipe Elbow (NRC6905)
– Front of fuel tank outrigger SWB RH (DA2019O)
Through Ebay in the UK, I found a second “fuel filler kit”:

Because I had moved my chair rail back, more comfortable because of my height, the filler neck of the tank had to be adapted. I have cut the neck halfway at approx. 45 degrees turned that a quarter turn and welded again, quite a job, because the weld also had to be fuel tight, but succeeded (even tested with air and soap until no bubbles were visible … ).

Then, the tank had to be painted a few times (black metal paint from Praxis … may also be Hammerite).

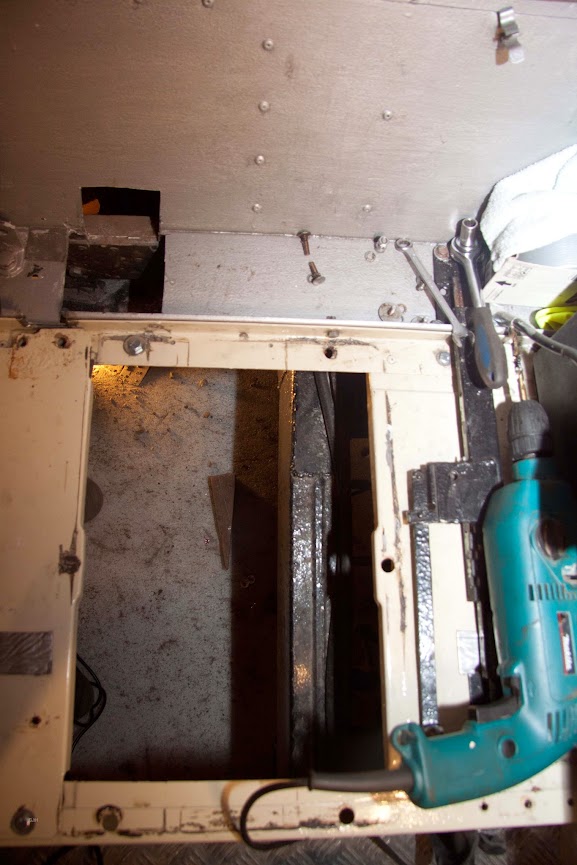
Under the right front seat some modification have to be made to facilitate the tank inlet, a hole in the bottom plate and a hole in the partition.

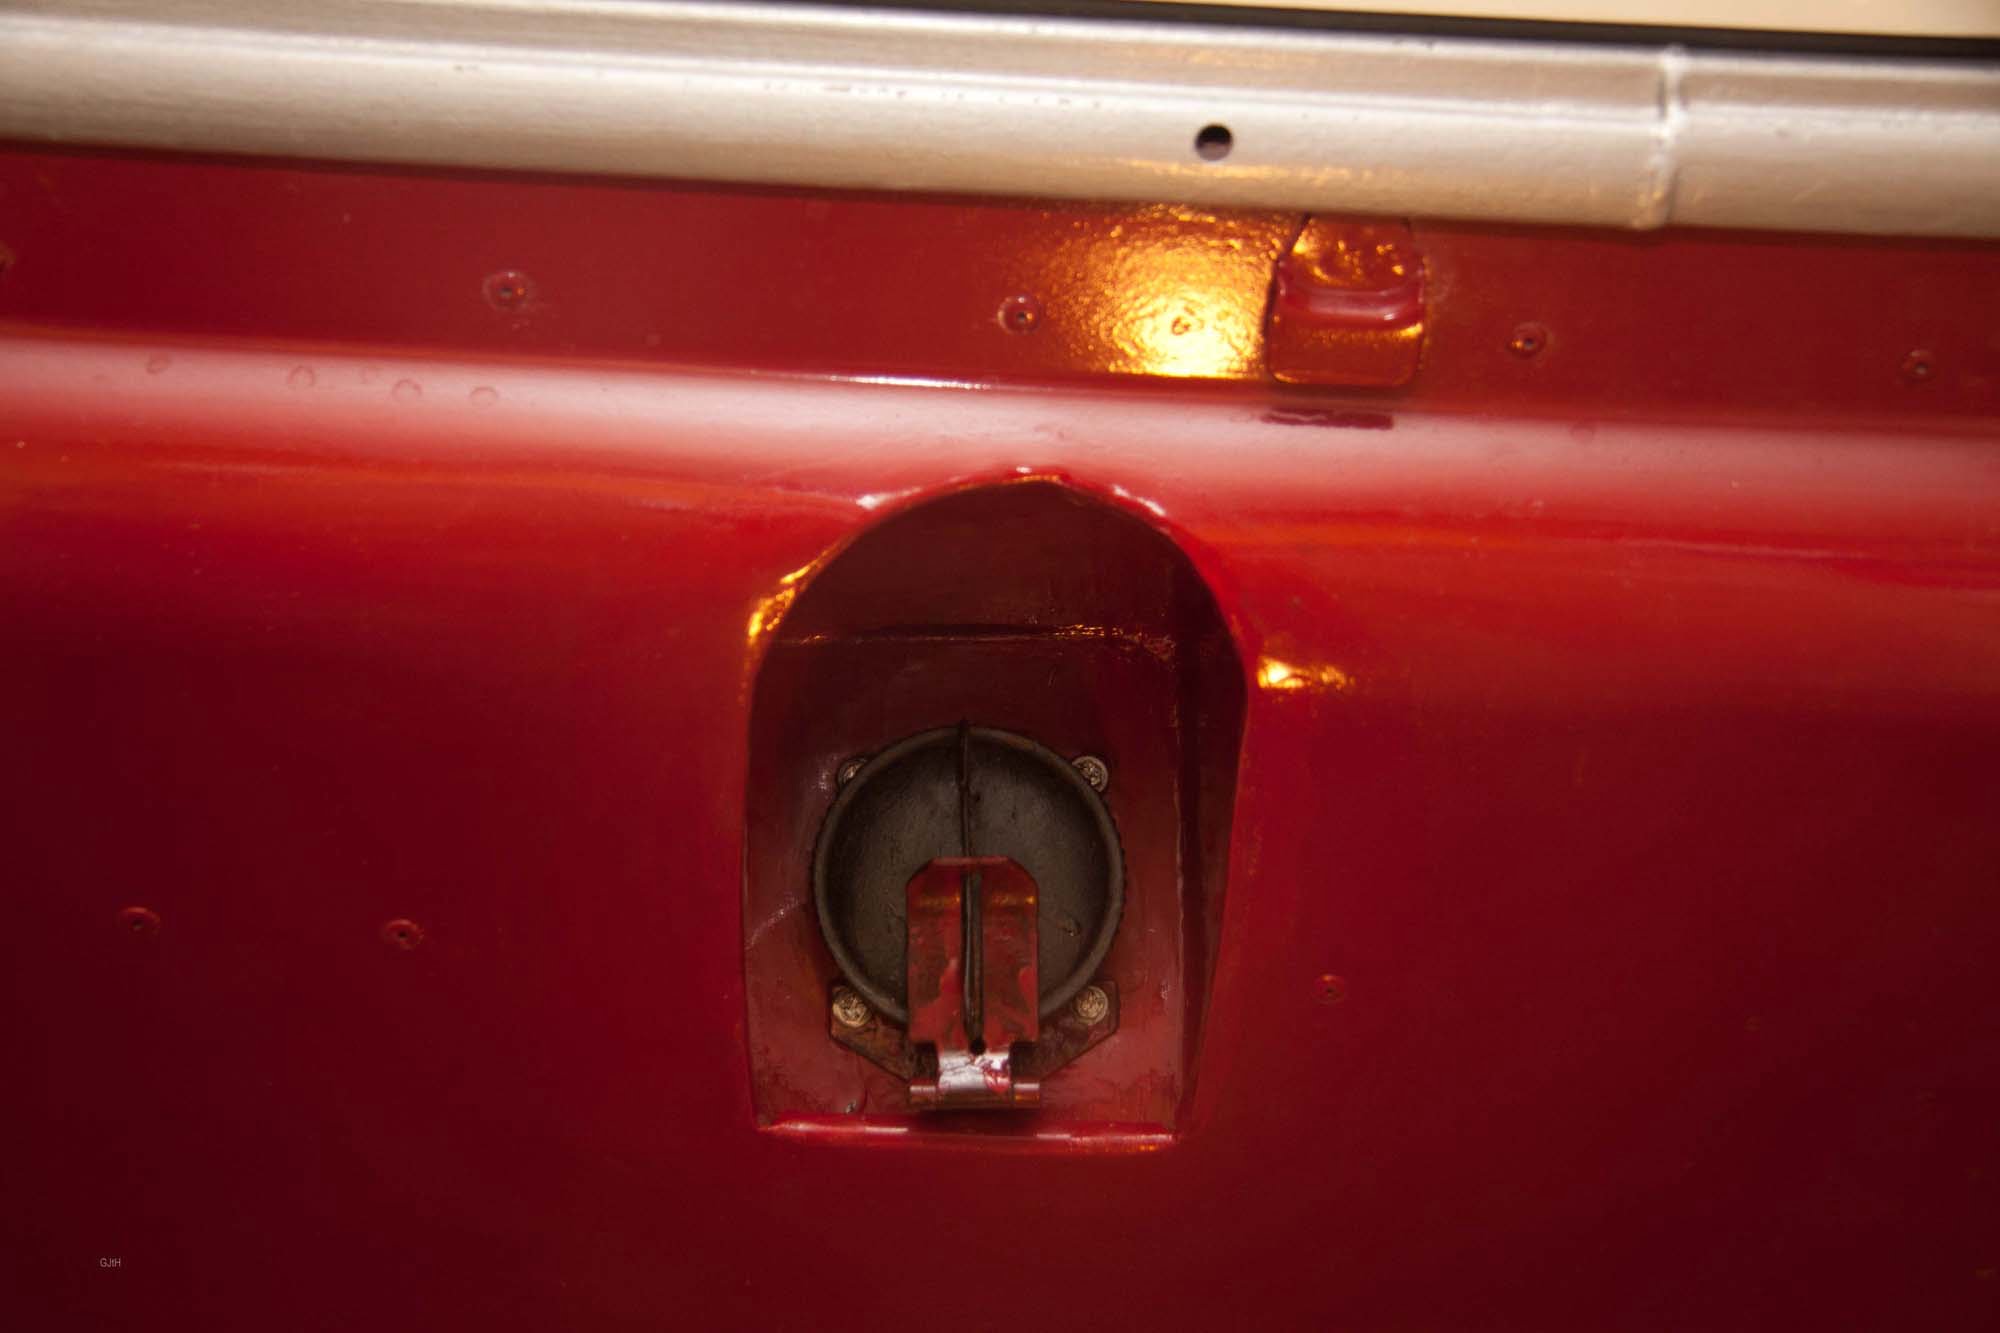
For the filling opening I have cut a hole in the sheet metal with a similar shape as the original cap only higher because otherwise the filler does not fit.

And sheet metal adapted to the inside so that the metal housing fits the chute.

I first made a cardboard model before I worked out the final aluminum plate.


Now the front of fuel tank outrigger had to be done. I created some workspace by getting Milady on a few blocks:

After marking (with the tank on a few blocks provisionally held in place), the outrigger could be installed and welded in place.

And again a few coats of metal paint.

Mounting the tank was still a matter of securing six bolts (put all the bolts in copper paste, so they can be released if necessary …).

So this is what it looks from above.

To be continued…